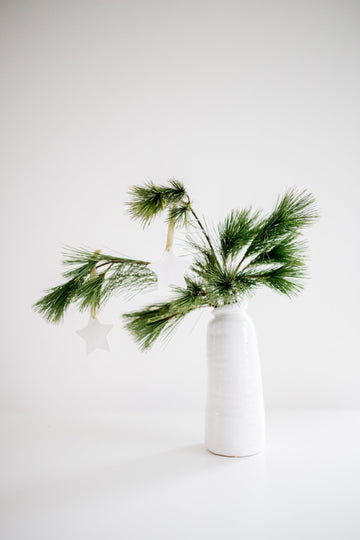
Oh no, I almost forgot to post the tutorial! I made these Christmas pendants and hung them in the branches in this vase. This way I still had some Christmas decorations in my office. The week has flown by, with lots of fun things to do! By the way, I'm renovating my entire office. Probably more about that later ;). So many products have arrived that I have to make room to fit it all. Have you done all your Christmas shopping yet? You can make these pendants last minute and are also very nice as a gift tag.
This tutorial is ideal if you want to make something cool quickly and easily. You already have all the materials at home, maybe not the clay yet? You can easily make fun shapes with clay. You can then paint it nicely afterwards. The clay is already nice and white by itself, so that is of course not necessary!
 Supplies:
- Clay
- Possibly something to roll the clay with
- Cookie cutters
Roll the clay into a thin layer and press the cookie shape into the clay. You can smooth the clay a little more by wetting your fingers slightly. If you want to make a pendant, press a hole in the clay with a pencil or another object. The clay dries in about a day in the air, let it sit for a while and then you can use it. By the way, the thicker you keep the clay, the longer it will take to dry!
This way you can easily make nice pendants, and of course you can make all kinds of beautiful objects with them!
 I wish you very happy holidays <3
Love,
Judith
Ps, I'm taking it a little easier during the Christmas holidays. But of course I will just ship your orders!