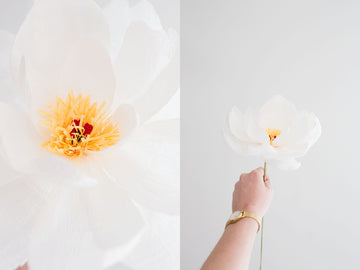
Oopsie, Floral Friday is just on Saturday this week ;). Sometimes you have a week where you keep lagging behind, that was last week for me. Fortunately, I was able to catch up and will have everything back in order next week. In any case, I really wanted to share this peony with you this week! I'm going to show you step by step how to make this flower.
The materials I use for the Peony:
Florist Crépe paper 180grams in different colors:
- Sage green for the finish
- Cream white 603 for the petals
- Yellow 575 for the stamens
- Intense Orange 580 for the pestles
- Possibly as an addition: a glue gun
Do you just want to make one flower to try it out? Then I have made a DIY package especially for you that already contains all the materials. You can try it out for €9.95!
Before you start: download the Template and print it at 100%.
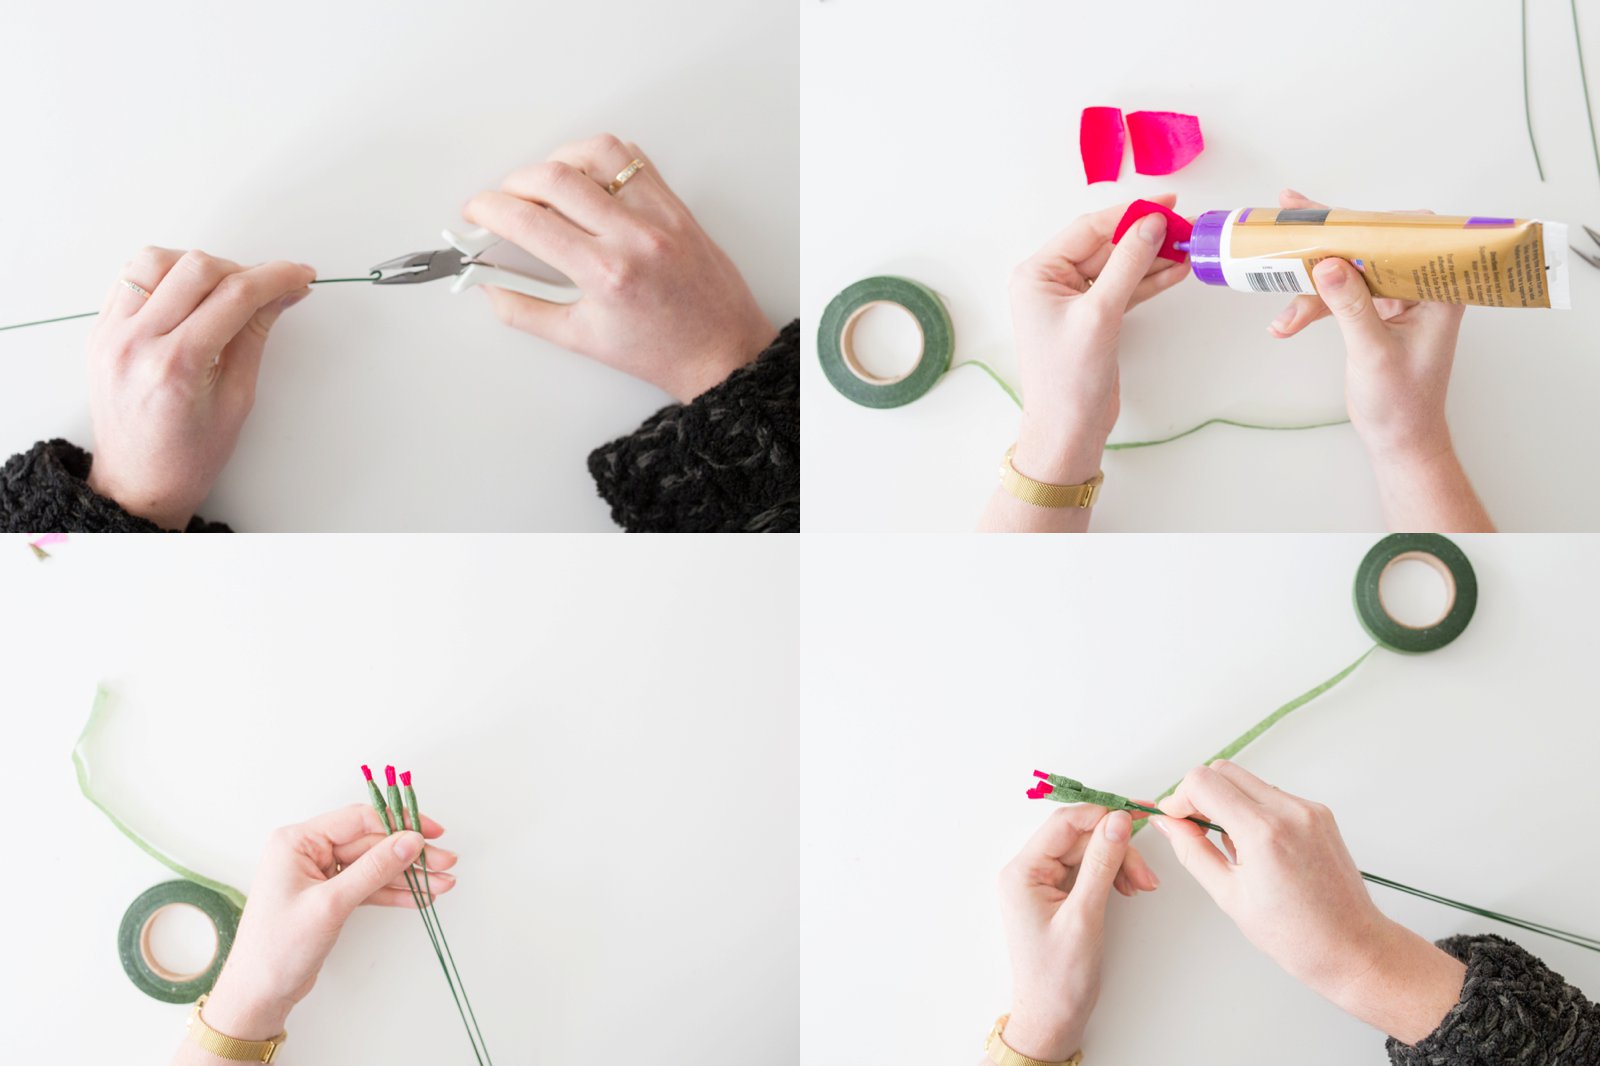
Step 1: The pestles
Cut 3x template 1 and glue half of it onto the iron wire. Then wrap a small thickening with Parafilm.
Parafilm only works by stretching it. You stretch the Parafilm and by placing two stretched layers on top of each other, it shrinks. Super sturdy and handy!
Then tie the three iron wires together with Parafilm. 
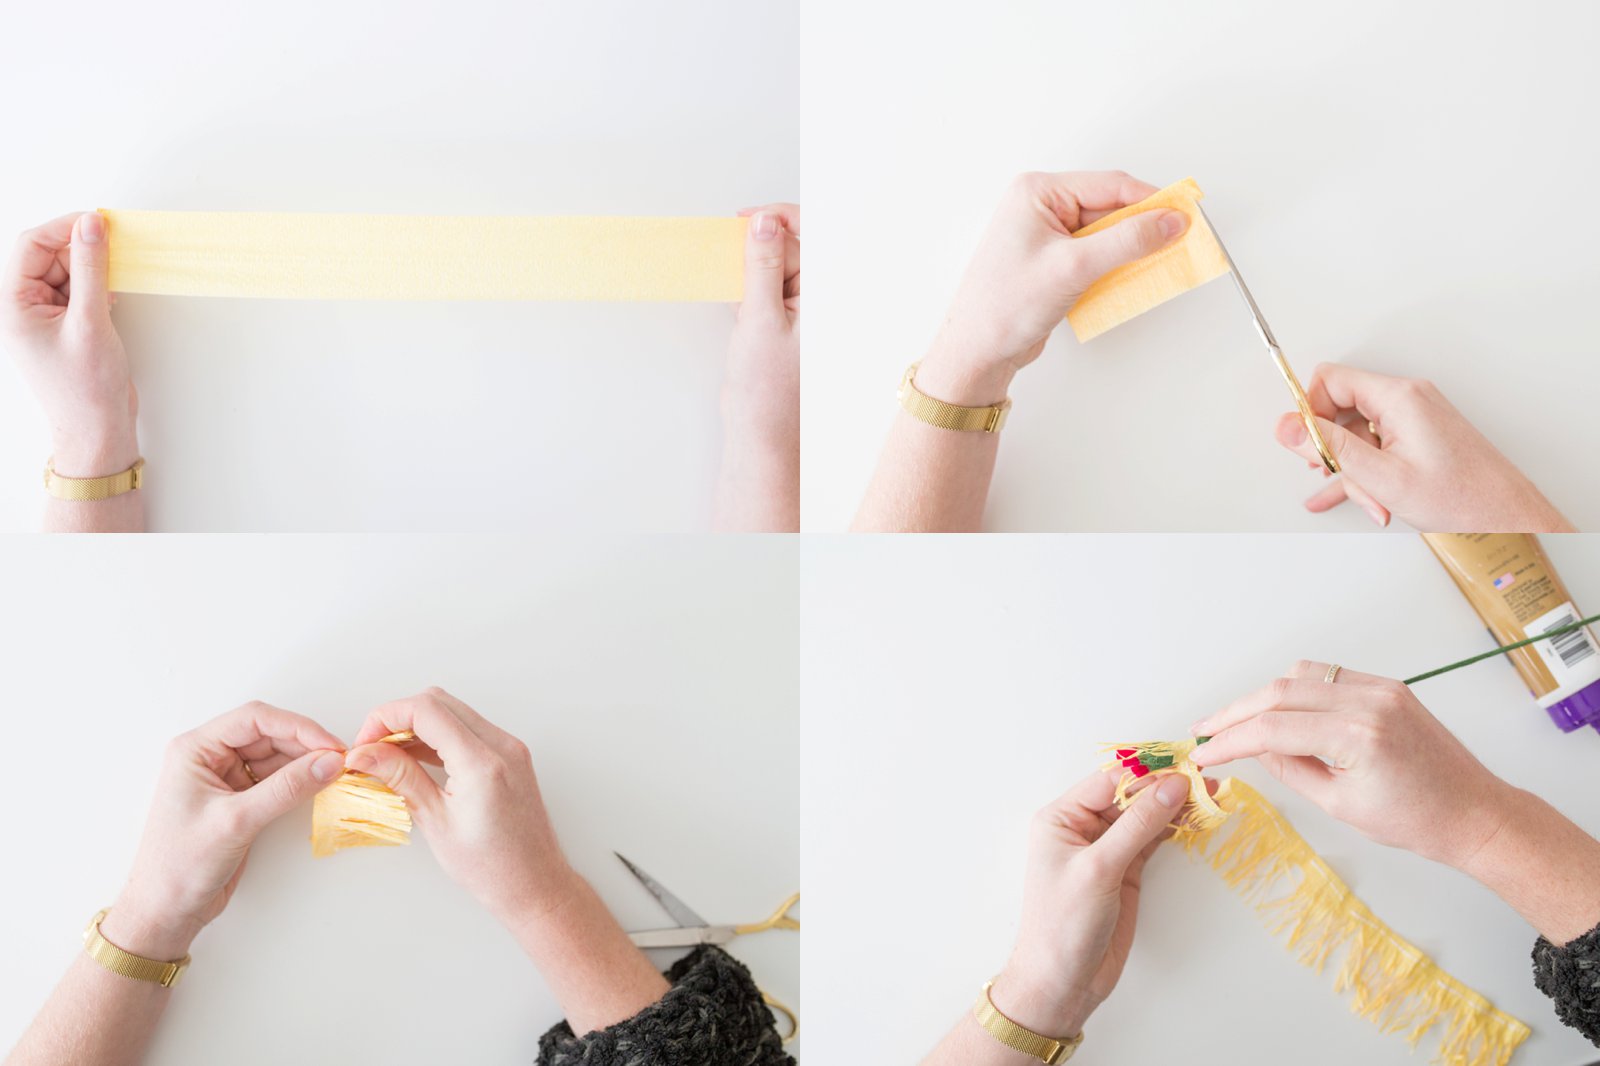
Step 2: The stamens
Stretch the yellow paper completely, cut template 2 twice from this paper.
Then cut the fringes in, and twist the fringes to make them look more natural. You always take a small strand and twist it over each other.
Then glue the two strips under the Stampers.
(ps, it is true that the stamens need to be a little longer, so keep the template included in the package)

Step 3: The petals
Cut templates 3, 4 and 5 each 5x. Stretch the paper with your thumbs so that you get a nice shape in the paper.
You first cut all the petals and shape them nicely. Glue the first round leaves to the stem, as you see below right. Stick half of the second round to the stem and half to the underside of the leaves of the first round. Stick the rest of the leaves under the other petals. So no more hitting the stem.


Step 4: The finishing touches
Cut a strip of green paper and cut this shape into it (photo will follow soon). Glue this to the iron wire.
Then you stretch the long narrow green strip. You use this to finish the stem. Glue the beginning firmly and then wrap the paper around the strip. Sometimes glue the strip in place in between.
Your flower should now be ready! YOU DID IT! :) You can possibly arrange the leaves a bit so that the flower opens a little further.
I'm super curious how it turned out! Share your creations on Instagram, tag @splendith and use #splendithpaperflowers
Love,
Judith
Ps, is there anything that is not clear? Ask your question at the bottom of the post!
