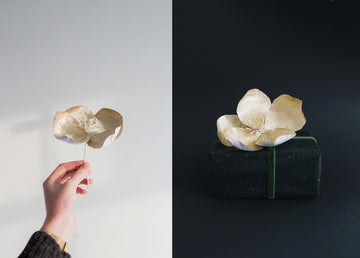
Nice to have you back with Floral Friday! Accidentally again on Saturday instead of Friday ;). But this time with video. So it took a little longer than planned. When I saw this beautiful metallic paper at my supplier, I was immediately inspired to make beautiful Christmas decorations with it. Isn't it super cool to put this on a present or decorate your Christmas tree? In the tutorial I use metallic paper, but you can of course use any color Florist crepe paper for this. This way you can make flowers that fit your right mood. And it's a super easy flower! So you can do it too :).
A video tutorial!
Maybe you have already read my previous blog? Here I post my first vlog online and you can read that I will be posting more videos. Maybe you often watch YouTube videos yourself? At least I'm one of them ;). I really enjoy following some people and when I'm looking for materials I often end up on YouTube. What are your favorite YouTubers? Videos are just a lot more personal and often fun to watch. Instead of just talking about it, I'll start right away: as in today. Instead of just images, you can now also watch the tutorial as a video!
Supplies:
- Florist crepe paper (I used color 806 )
- Flower wire (I used thickness 0.9)
- Stamens (I used white mother of pearl and the golden one from 'Metallic')
- Floral Tape (I used white)
Video tutorial paper flower
Photo Tutorial
Step 1: Make the center of the paper flower
You tie a number of stamens together with floral tape. Pulling it apart releases some glue and keeps the tape in place. You cut a piece of flower wire in half with the combination pliers. The inner part of the pliers is a cutting pliers. Then make a small loop at the top. This prevents everything from slipping off the wire. Then you tape the stamens to the iron wire. The center of the flower is now ready.
Step 2: Cut the leaves for the flower
Cut five leaves. You first cut a strip at the height of the leaves. Then you cut strips of about 3 cm wide. Press the shape into the leaves with your thumbs. Then cut the top round and the bottom closed.
 Step 3: Details
Fold the bottom of the leaf over, apply a little glue and then stick the leaves evenly around the stem. Before you fold the leaves down, first tape the leaves securely. You use floral tape for this again, tape over the folded piece, all the way to the bottom.
YOU DID IT :).
Do you have any questions? Post them below in the comments.
Love,
Judith
